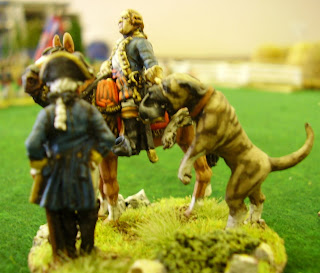
Washington ponders the news that the British are a coming.
Another attempt at the Black Powder rules.
We took the scenario from the Black Powder book but as we were using half size units
we adopted the 2/3 movement and range play sheet (thanks Jeff).
The British/German army had a couple more battalions than the Rebels and also four guns whilst the American's had none. Moreover the British troops were deemed to be "steady" and "crack", effectively enhanced morale.
Initial dispositions had the first British brigade (Hamilton's) marching along the road and a picket were wandering over to have a peek at the farm and woods. No pesky rebels in sight. The Brits get to move first, in theory, as a throw of 11 on Command prevents Hamilton's brigade from moving. The second Brigade however marches onto the table and along the road. The picket is (not very) surprised to be fired on from the woods as Morgan's brigade reveal themselves.
(piccies look better when enlarged than shown here)
With an excellent Command throw Poor's Brigade of Rebels advance between the farm and woods to Morgan's left hoping to reach the stream before the British.
The second British Brigade, Fraser's, enter the table in column of march with a skirmish line of injuns covering their right. In the centre the pickets engage Morgan's brigade in a long range firefight and Hamilton manages to bring one battalion forward before another Command failure.
Fraser manages to advance (slowly) on the right but in the centre Hamilton manages to turn column into line but then fails to advance following two Command Failures. The Yanks however pour forth along woodland paths and find an excellent defensive position with stream in front and between woods and farm.
Eventually the Germans arrive following Fraser along the road. Two excellent command throws see them in line and pouring fire into the rebels while the British continue with poor Command throws and struggle into battle line. The Picket and the lone batallion in the firefight with the American right are routed but the Americans hold their line.
The Americans have an excellent defensive position behind the stream and although this deters the charge with cold steel the British/ German firepower enhanced with artillery is proving superior. The "steady" and "crack" rules prove invaluable to the Brits in the firefight. Eventually the poor morale of the Americans begins to tell and they begin to withdraw.
The result was pretty much as that played out by the authors of the rule book and given the breakdown of the armies seems alomost inevitable. Given the poor Command thorws of the Brits more agressive tactics could have paid off for the Americans. However given the poorer troop morale levels and the excellent defensive position on offer it would have been a very brave and fortunate commander who could beat the British in this scenario.
Regimental mascot eats colonel's tricorn!

Washington ponders defeat with faithful friend.


Nice report! I love the various command vignette stands, with the different dogs!
ReplyDeleteFlavorful rules can be fun, but, yeah, often they seem harder to absorb unless you play more games more often with them. It's hard to strike that balance between simple and flavorful.
A very good report . . . and cogent afterthoughts as well. As you suggest, not a very balanced scenario . . . but then few historic battles were. Thank you for sharing your thoughts.
ReplyDelete-- Jeff
One can never have too many hounds about...
ReplyDeleteThat's a very nice collection of soldiers you have there,I enjoyed the report too.
ReplyDeleteInterested to see how it panned out. Did you use the automatic move if within 12" of the enemy? (or 8" if using 2/3 rule). It's helps balance out some of those duff rolls.
ReplyDeleteHi Punictunic, how's things? We did use the automatic move and Tony would have done had he got to within 8"!
ReplyDeleteI'm gettin round to rebasing my 15mm Sudan wars to try out with BP, so I intend to persevere.
If you want to push an elephant uphill perseverance is the key:) Strange synchronicity with the Sudan as I've just finished painting up and basing what seems an endless amount of Dervish for BP but actually stands at about 20 units. If you want to borrow them for a game (also have 8 Anglo-British infantry units - cavalry on the painting table)drop me an email and I'll drop them off.
ReplyDelete